¶ Flashing custom rootfs using Ubuntu [rkdeveloptool]
The main idea of the method is to change the default rootfs to a custom one that has a known root password.
The following manual assumes that you have already completed the backup and have rkdeveloptool installed (non-Secure Boot Go2 only)
First, let's remove the top cover from the robot. Please refer to video of disassembly of Go2
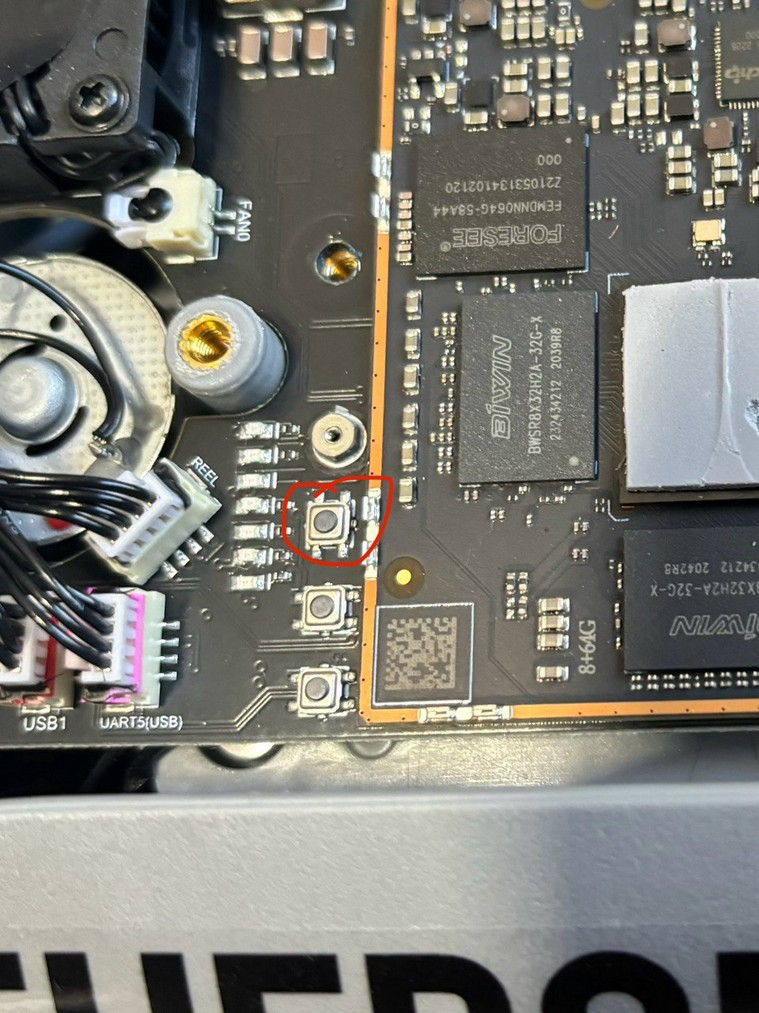
To enter Loader mode, first connect a USB Type-C cable from the device to the PC. Make sure the cable is long enough so that it does not become tense when the dog stands up or lies down. Otherwise, the USB port could easily be torn down. Then, press and hold the upper button on the mainboard while turning on the Go2. The robot should not stand up after this action.

check it by running:
sudo rkdeveloptool ldYou should see the USB device detected in 'Loader' mode
Check the partitions
sudo rkdeveloptool pptThe next step involves flashing the custom rootfs. The custom rootfs images can be found here
Download a custom image, unzip it
unzip 1.0.XX_go2_rootfs_rooted_vX.X.zip
Flash the custom rootfs Image to the partition:
sudo rkdeveloptool wl 0x79000 rootfs.img
reboot the dog
sudo rkdeveloptool rd
After some time the head light should turn green and the dog should stand up
The default credentials for the custom firmware:
- user: root
- password: theroboverse
Enjoy your root access by ssh-ing under root:
ssh root@[your_dog_ip]
You should see the theroboverse banner welcoming you:
